
Leave Your Message

7 Tips for Choosing the Best Steel Sealer

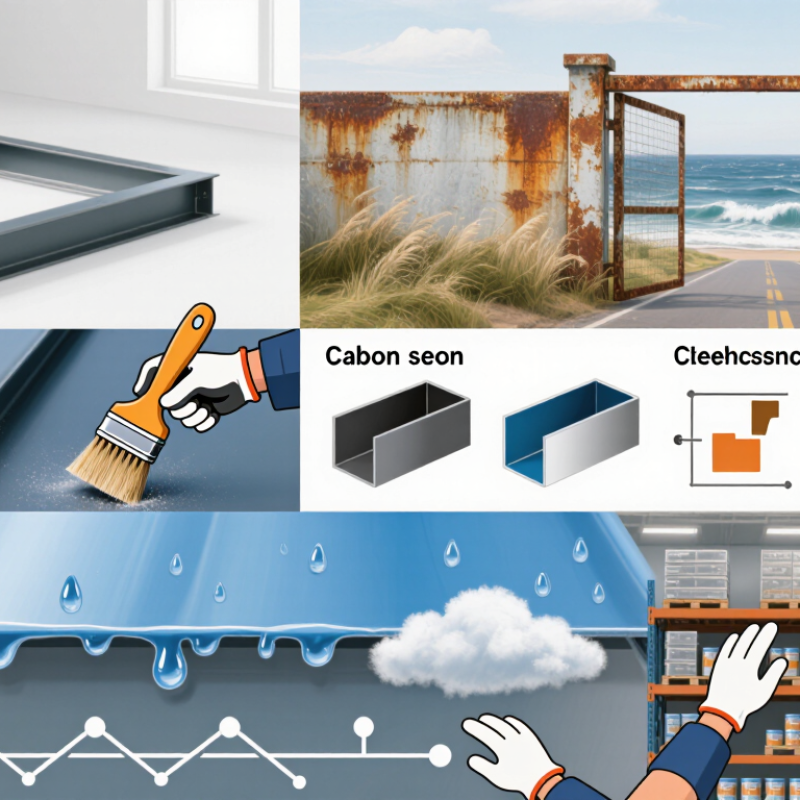
Choosing the right Steel Sealer is rarely as simple as selecting the glossiest product on a store shelf. Steel surfaces differ in age, texture, exposure, and previous coating history. A sealer that performs well on a clean indoor frame may fail on a weathered gate beside a coastal road. Small details matter.

This guide explores seven practical tips for making a more dependable choice. It considers surface preparation, corrosion resistance, adhesion, curing time, finish, environmental conditions, and manufacturer documentation. Look beyond attractive packaging. Check whether the product suits carbon steel, galvanized steel, stainless steel, or painted metal. Examine the technical data sheet. It should explain coverage, application temperature, drying time, and compatible topcoats.

Test a small area first.

That simple step can reveal poor adhesion, uneven color, or unexpected reactions with an older coating. Moisture also deserves attention. Even a thin film of water can weaken bonding and trap corrosion beneath the sealer. In real projects, rushed preparation often causes more trouble than product quality. That point is easy to overlook.

No Steel Sealer is perfect for every setting. A durable industrial formula may be excessive for a lightly used indoor fixture, while a budget option may disappoint outdoors. Consider ventilation, handling requirements, maintenance plans, and the surface’s expected service life. Reliable decisions come from comparing evidence, not relying on one impressive claim. These tips cannot replace professional advice for complex or high-risk applications, but they can make product selection clearer, safer, and more practical.

7 Tips for Choosing the Best Steel Sealer

What Steel Sealers Do and Why They Matter

Steel sealers protect metal by limiting contact with water, oxygen, salts, and industrial pollutants. This matters because corrosion weakens surfaces before damage becomes visible. The IMPACT study by NACE International estimated global corrosion costs at about $2.5 trillion annually, equal to nearly 3.4% of global economic output. The World Steel Association reported roughly 1.89 billion tonnes of crude steel production in 2023. Even small protection failures can affect enormous assets.

Tip 1: Match the sealer to the exposure. Indoor steel needs different protection from coastal, wet, or chemical environments. Check adhesion, moisture resistance, curing time, and temperature limits. A thick film is not automatically better. Poor surface preparation can leave dust, oil, or mill scale beneath the coating. Field inspections often find this hidden weakness.

Tip 2: Read the technical data sheet carefully. Look for dry-film thickness, surface profile, application temperature, and recoat intervals. Independent testing, such as salt-spray or cyclic-corrosion testing, provides useful evidence, but it cannot copy every real environment.

Tip 3: Inspect edges, welds, bolts, and scratches closely. These areas fail first. A perfect sealer is unlikely, so plan touch-ups and scheduled inspections. That small maintenance step is easy to underestimate.

How to Assess Steel Type, Exposure, and Protection Needs

7 Tips for Choosing the Best Steel Sealer

How to Assess Steel Type, Exposure, and Protection Needs

Steel does not react the same way in every environment. Identify the substrate before choosing a sealer. Bare carbon steel can rust quickly after cleaning, especially in humid air. Galvanized steel needs a compatible product and careful surface preparation. Stainless steel may require light abrasion to improve adhesion. Weathering steel also needs room to form its protective surface.

Study the exposure in practical terms. Is the steel near salt spray, standing water, chemical vapor, or heavy sunlight? Check joints, welds, bolt heads, and lower edges first. These areas often collect moisture and fail before broad, flat surfaces. In field inspections, I record temperature, humidity, surface cleanliness, and visible corrosion. Small details matter. They affect curing and service life.

Match the sealer to the protection goal. A thin barrier may suit an indoor frame, while outdoor steel may need stronger moisture and ultraviolet resistance. Confirm the recommended surface profile, application thickness, drying window, and topcoat compatibility from technical documents. A small test patch can reveal poor adhesion or unexpected color changes. Still, one test patch can mislead if the steel varies across the site. I have learned to inspect several locations instead of trusting one perfect sample. Keep maintenance access in mind, because the best sealer cannot compensate for neglected drainage or repeated abrasion.

Which Sealer Formula Best Matches the Application

Choosing the best steel sealer starts with the application, not the product label. Tip 1: Check the steel surface first. Clean steel may accept a thin penetrating sealer, while pitted or lightly corroded steel needs stronger barrier protection. Tip 2: Consider moisture, salt, chemicals, and temperature. A sealer used on an indoor frame may fail quickly on a coastal railing. I have seen seemingly sound coatings blister after one wet season.

Tip 3: Match the formula to the curing conditions. Water-based sealers suit ventilated indoor areas and offer easier cleanup. Solvent-based formulas can perform better in demanding environments, but airflow and drying time matter. Tip 4: Confirm compatibility with the planned topcoat. An epoxy sealer may create a durable foundation, yet some finishes require specific recoat windows. Test a small area first. It prevents expensive surprises.

Tip 5: Measure the steel temperature, not only the air temperature. Cold metal can trap condensation beneath the film. Tip 6: Review the technical data sheet for coverage, surface preparation, and cure time. These details are more reliable than broad claims. Tip 7: Choose the simplest formula that meets the real exposure level. More protection is not always better; excessive film thickness can crack, sag, or cure unevenly. I would also record the batch, weather, and application method. My own records are imperfect, but they reveal patterns that memory misses.

How to Compare Adhesion, Durability, and Safety Features

7 Tips for Choosing the Best Steel Sealer

How to Compare Adhesion, Durability, and Safety Features

Choosing a steel sealer starts with adhesion, not a glossy label. In my workshop, I test a small hidden area before coating an entire panel. The steel must be clean, dry, and free from oil, mill scale, and loose rust. I lightly abrade the surface, remove dust, and apply a thin test coat. Start small. After curing, I use a crosshatch cut and tape pull. Lifting around the cuts suggests weak bonding. Test twice when the surface history is uncertain.

Durability depends on moisture, abrasion, heat, and expected movement. A sealer for an indoor cabinet may fail on a gate exposed to rain and grit. Check technical data for hardness, flexibility, and resistance to cleaning chemicals. Inspect edges, welds, and bolt holes carefully. Corrosion often begins there. Thin, even coats usually outperform one heavy coat. I once rushed this step. The finish looked smooth, but trapped solvent caused soft spots days later. Cure time is part of the system, not a minor detail.

Safety features deserve equal attention. Read the safety data sheet before opening the container. Confirm ventilation, skin protection, eye protection, and storage requirements. Clear instructions and predictable curing behavior build confidence. Low odor does not automatically mean low risk. Ask whether the sealer suits the workspace and nearby materials. When uncertain, pause and seek qualified technical advice. Reliable choices come from measured tests, written records, and honest limits.
How to Apply, Inspect, and Maintain a Steel Sealer

Choosing the best steel sealer depends on more than corrosion resistance. I check the steel’s environment, expected moisture, temperature, and mechanical wear. A sealer suited for indoor beams may fail on an exposed gate. Read the technical data sheet carefully. Compatibility matters.

Preparation decides much of the result. Remove oil, loose rust, dust, and old flakes before application. Abrasive cleaning often gives better adhesion than simple wire brushing. The surface must be dry. Very dry. I apply thin, even coats with a suitable brush, roller, or spray system. Heavy layers can trap solvents and wrinkle during curing. Follow the stated mixing ratio and recoat window. Guesswork is risky.

Inspection should happen under bright, angled light. Look for pinholes, runs, missed edges, and uneven gloss. A dry film thickness gauge provides stronger evidence than appearance alone. On critical work, an adhesion test can reveal weak bonding. Record batch details, temperature, humidity, and application time. These notes help explain failures later. Maintenance is practical, not optional. Clean dirt from the sealed steel and inspect joints, corners, and damaged areas every few months. Repair scratches quickly after removing loose material. I once ignored a small edge chip; rust spread beneath the coating before the next inspection. No method is flawless. Good records make mistakes visible.